Group Policy settings can be edited for both computer and user configurations.
Here’s a step-by-step process for editing Group Policy settings:
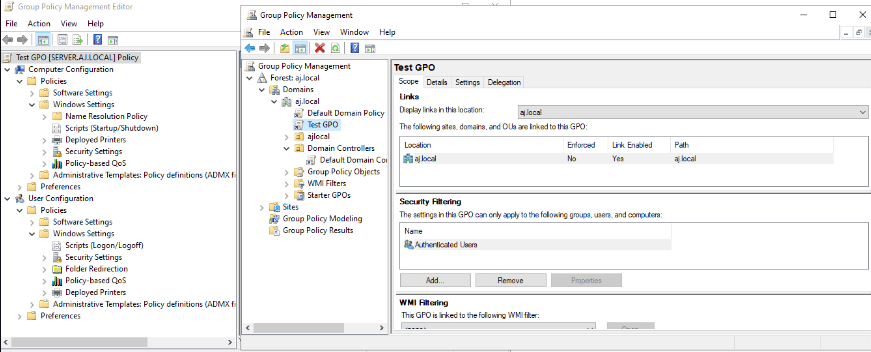
- Open the Group Policy Management Console:
- On your domain controller, open Server Manager.
- Go to Tools.
- Select Group Policy Management.
- Locate the Target GPO:
- In the Group Policy Management Console, navigate through your Forest > Domains > yourdomain.com.
- Locate the specific Organizational Unit (OU) where your GPO is linked, or find the GPO under the “Group Policy Objects” container.
- Edit the GPO:
- Right-click on the Group Policy Object (GPO) you wish to edit.
- Select Edit from the context menu. This action opens the Group Policy Management Editor.
- Navigate Configuration Sections:
- Within the Group Policy Management Editor, you will see two main sections:
- Computer Configuration: Settings under this section apply to computers, regardless of who logs on. These settings are applied when the computer starts up.
- User Configuration: Settings under this section apply to users, regardless of which computer they log into within the domain. These settings are applied when the user logs on.
- Within the Group Policy Management Editor, you will see two main sections:
- Browse and Select the Desired Setting:
- Expand either Computer Configuration or User Configuration (depending on whether you want to apply a computer-specific or user-specific setting).
- Navigate through the various categories such as:
- Policies
- Administrative Templates (contains most common customizable settings)
- Software Settings
- Windows Settings
- Drill down to the specific policy setting you want to modify (e.g., User Configuration > Policies > Administrative Templates > Desktop > Desktop for wallpaper settings).
- Configure the Policy Setting:
- Double-click on the specific policy setting to open its properties window.
- Choose one of the following options:
- Not Configured: The policy setting is not applied, and the setting from a lower-precedence GPO or the local setting will be used.
- Enabled: The policy setting is active and applied. You may need to provide additional details or values (e.g., path to a wallpaper image, specific restrictions).
- Disabled: The policy setting is active and set to be off, preventing it from being applied.
- Configure any additional parameters required by the policy (e.g., enter a path, select an option from a dropdown).
- Click Apply, then OK to save the changes to the specific policy setting.
- Close the Group Policy Management Editor:
- Once you have configured all desired settings, close the Group Policy Management Editor.
- Update Group Policy on Client Machines (Optional for immediate effect):
- Open a Command Prompt on the target client compute.
- Type
gpupdate /forceand press Enter. - Note: Policies are periodically refreshed on client computers, but
gpupdate /forceensures immediate application of the new settings. Some settings may require a reboot or logoff/logon to take effect.