1. 👥 Creating a New User Account #
A User Account is an object in Active Directory that represents a person and is used for authentication and authorization across the domain.
Step-by-Step Process #
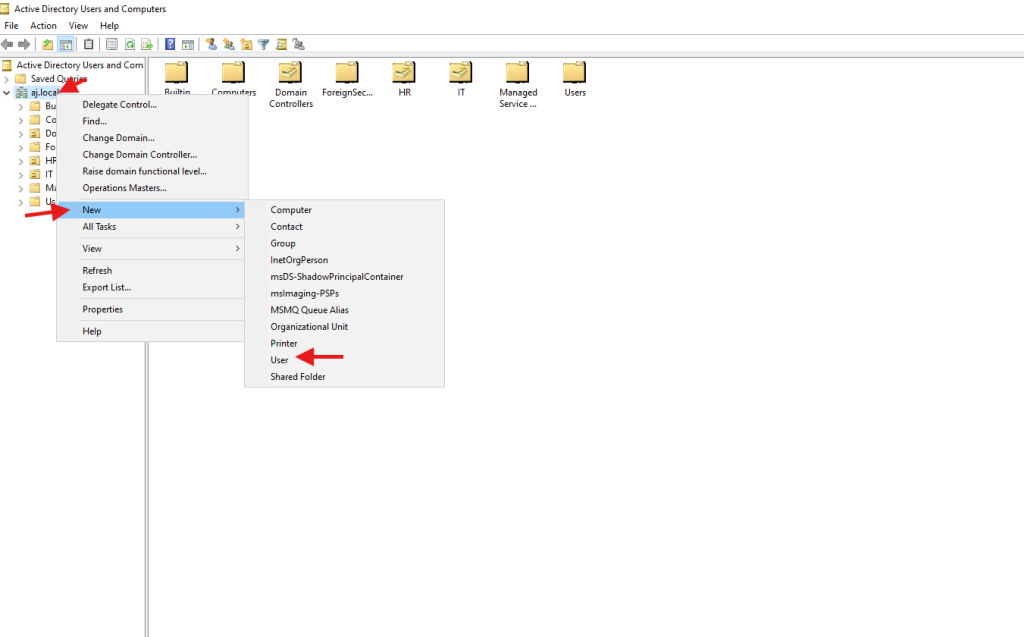
- Open ADUC: Launch the Active Directory Users and Computers console (dsa.msc).
- Locate OU: In the left pane, navigate to and select the Organizational Unit (OU) where you want to place the new user.
- Initiate Creation: Right-click the desired OU, point to New, and then click User.
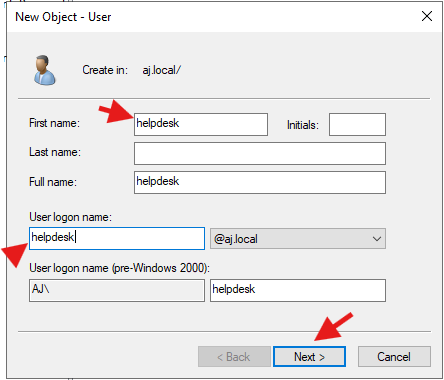
- Enter Identification Data:
- First name: (e.g., Jane)
- Last name: (e.g., Doe)
- Full name: (Automatically populated as Jane Doe)
- User logon name: This is the username used for domain sign-in (e.g., jdoe or jane.doe).
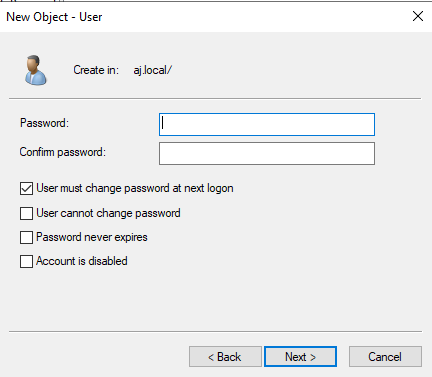
- Set Password: Click Next and enter the password twice.
- Configure Password Options: Select the required password policy options:
- User must change password at next logon: (Standard security practice)
- User cannot change password: (Used for service accounts)
- Password never expires: (Used for service accounts)
- Account is disabled: (Used for creation, enabled later)
- Finalize: Click Next and then Finish.
Note: After creation, right-click the user account, select Properties, and navigate to the Member Of tab to add the user to relevant security groups (e.g., Domain Users, Remote Desktop Users, etc.).
2. 🖥️ Creating a New Computer Account #
A Computer Account is an object that represents a client machine or server joined to the domain. This object is automatically created when a machine is successfully joined to the domain, but it can be pre-staged manually.
Step-by-Step Process (Manual Staging) #
- Open ADUC: Launch the Active Directory Users and Computers console.
- Locate OU: Navigate to and select the target Organizational Unit (OU) where the computer object should reside.
- Initiate Creation: Right-click the desired OU, point to New, and then click Computer.
- Enter Computer Name: Enter the exact name of the computer as it will appear on the network (e.g., WIN10-JDOE).
- Set Delegation (Optional): Click Change to specify which domain users or groups are allowed to join the workstation to the domain using this pre-staged account.
- Finalize: Click OK.
Joining the Computer to the Domain (Client Side) #
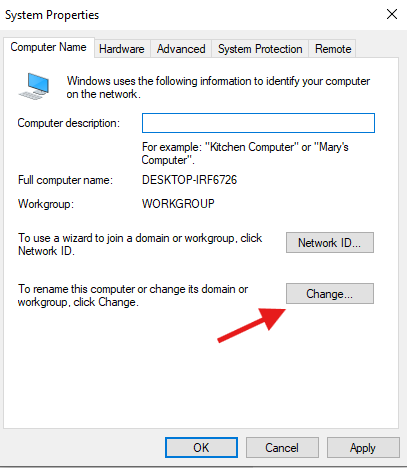
- Access System Properties: On the target client machine, go to System Properties > Computer Name tab.
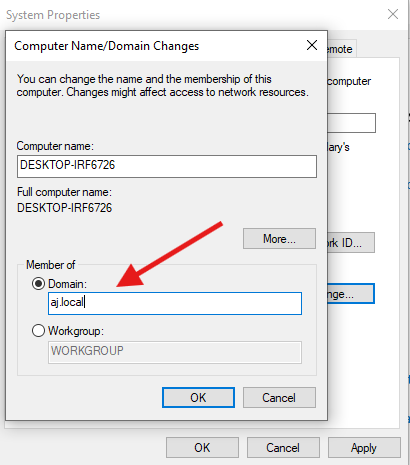
- Change Settings: Click Change and enter the full Domain Name (e.g., example.local).
- Authenticate: A window will prompt for credentials. Enter the username and password of an account authorized to join computers to the domain (e.g., jdoe or an Administrator account).
- Reboot: After successful authentication, the computer will reboot and be joined to the domain, associating itself with the corresponding computer object in AD.